Soil sampling is a critical step to making effective crop nutrient decisions, and is one of the most profitable operations you can perform on your farm in a given year. A proper soil sample is the only way to determine whether your soils contain adequate levels of plant essential nutrients such, and how soil parameters like pH can affect the availability of those nutrients.
On livestock farms, identifying present nutrient levels in the soil is crucial to developing a proper nutrient management plan. Managing nutrients generated from livestock as well as any fertilizer or amendments applied to the farm is important to improve agronomic crop response while minimizing environmental degradation.
Accurate soil sample results can show changes in field nutrient levels over time as well, which can be used to fine-tune recommendations over time, depending on whether you are looking to build, maintain, or deplete soil nutrient levels. This guide will take you through the process of soil sampling to ensure that you get accurate results to make proper decisions.
Before you get to the field:
It’s important to have a plan for when, where, and how you will sample before getting to the field.
- Have a plan for when to sample each field.
Sample at least every 3-4 years, depending on the field’s rotation. Try to sample at the same part of the rotation and same time of year each time to be able to compare results over time. Soil nutrient content and pH can fluctuate based on the season and plant uptake.
For example, many producers choose to sample following wheat harvest in a corn-soybean-winter wheat rotation, to give lots of time for sampling and analysis to make a crop fertility plan. - Plan where to sample within the field.
Often, this means identifying how much variation exists within the field, and whether a basic composite sample of the field provides best value, or if it makes more sense to utilize a grid, zone, or sensor-based sampling option instead. More information on sampling strategies on factsheet: …… - Gather the right tools.
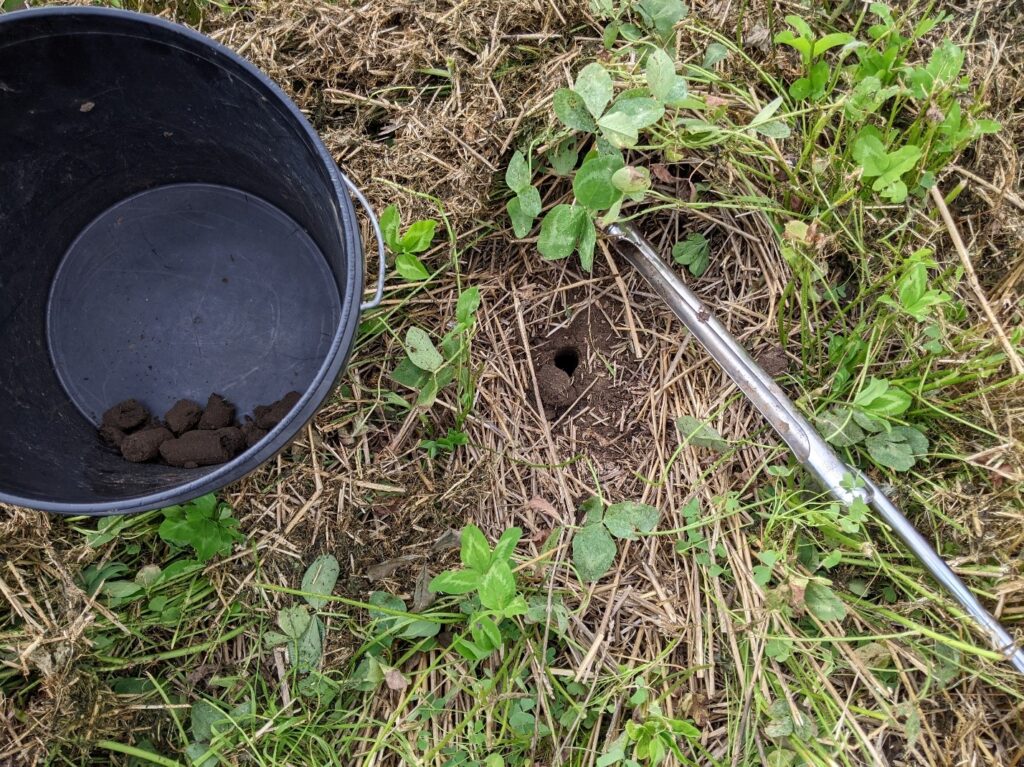
Use a stainless steel soil probe or auger, and a clean plastic pail. If you can label soil boxes or bags ahead of time, it can save time in the field. Take some extra boxes or bags along in case you see an area in the field that might require an extra sample.
Avoid galvanized metals with all tools, as it can contaminate the sample for micronutrient analysis.
At the field:
Proper, consistent sampling throughout the field will give the best snapshot of your soil’s fertility levels.
- Sample to the right depth – 15 cm (6 in.).
Standard Ontario fertility soil samples are taken at a 15 cm (6 in.) depth, to reflect the soil’s fertility where the majority of roots lie and nutrient exchange occurs. The exception to this rule is in the case of nitrate-nitrogen samples, which are taken to a 30 cm (12 in.) depth, and for pH only in continuous no-till systems, which may be taken to a 5 cm (2 in.) depth.
Sampling too shallow or too deep will over- or underestimate nutrient levels. - Scrape away surface plant residue before sampling.
Crop residue can interfere with getting a good sample core at the proper depth. It can also misrepresent soil test result by overestimating measures such as organic matter. - Pull soil cores representative of area you are covering.
A minimum of 20 cores per sample are recommended and should be taken in a zig-zag pattern across the sampling zone or spread out from a single point when grid sampling. This can prevent misrepresentation of the sample from variation either naturally or due to management. For example, a single core taken in location where fertilizer was loaded on a spreader may pick up higher nutrient levels than the rest of the sample.
It’s also important to adjust sampling pattern to the field history – has fertilizer been banded with the planter or strip tiller, or manure been injected? Sampling directly within high fertility bands can give inaccurate results for the overall field’s fertility. Table 1 gives guidance to ensure that soil cores are taken accurately.
Table 1. Sampling guidelines to account for banded nutrients
| Band spacing | Placement | Collect |
|---|---|---|
| 76 cm (30 in.) | Planter | 1 core within the band for every 20 out of the band |
| 30 cm (12 in.) | Planter | 1 core within the band for every 8 out of the band |
| 76 cm (30 in.) | Strip till, manure injector | 1 core in the zone for every 3 out of the zone, where zone of influence is 25 cm (10 in.) wide |
| Spacing known, location unknown | Planter | Paired sampling: 1 random core followed by a second core 50% of the band spacing from first core, perpendicular to band direction |
| Other spacing: to determine | Planter | S = 8 [x ÷ 30cm] or S = 8 [x ÷ 12 in.] where S = number of cores between bands, x = band spacing in cm or inches (Outside influence of band is 5cm for planter placed fertilizer) |
- Mix sample and bag up a subsample.
Mix the soil cores together well in your pail, and bag/box up approximately 500 g (1 lb).
While the amount that soil labs actually use is much smaller than this, it’s important to get enough soil to ensure it is representative of the area. - Label, record, and double check.
Whether you label your soil boxes/bags ahead of time or in the field as you take them, double check that you have them labelled correctly to determine the part of the field they represent. Also ensure that you are recording with GPS or on a map where the samples were taken.
After Sampling is Done:
- Fill out lab submission form.
Make sure sample bag/box labels match what is being sent to the lab.
OMAFA-accredited soil test labs offer different packages of soil nutrient and characteristics to analyze. Check that your analysis receives the analyses you are looking for, most often soil pH and buffer pH, phosphorus, potassium, and magnesium, as well as micronutrients like manganese and zinc.
Request that labs perform OMAFA-accredited tests to ensure that results can be accurately used for fertility recommendations. - Send to OMAFA-accredited soil test laboratory.
A list of OMAFA-accredited facilities is located here.
These labs have shown proficiency and accuracy in measuring Ontario soils using approved methods.
Soil sampling is the first step in creating a soil fertility plan for your field. Sampling correctly will ensure that the results you get back are meaningful and representative of your field in that time and place.
References
1. Fernandez, F.G., and D. Schaefer. 2012. Assessment of Soil Phosphorus and Potassium following Real Time Kinetic-Guided Broadcast and Deep-Band Placement in Strip-Till and No-Till. Soil Science Society of America Journal. 76: 1090-1099.
2. Kitchen, N.R., D.G. Westfall and J.L. Havlin. 1990. Soil Sampling under No-Till Banded Phosphorus. Soil Science Society of America Journal. 54: 1661-1665.